For the short-handed sailor planning long ocean crossings, a self-steering windvane is not essential but darn close to it. For boats with stern-hung rudders, a self-steering windvane can be constructed with readily available materials and a modest level of skill.
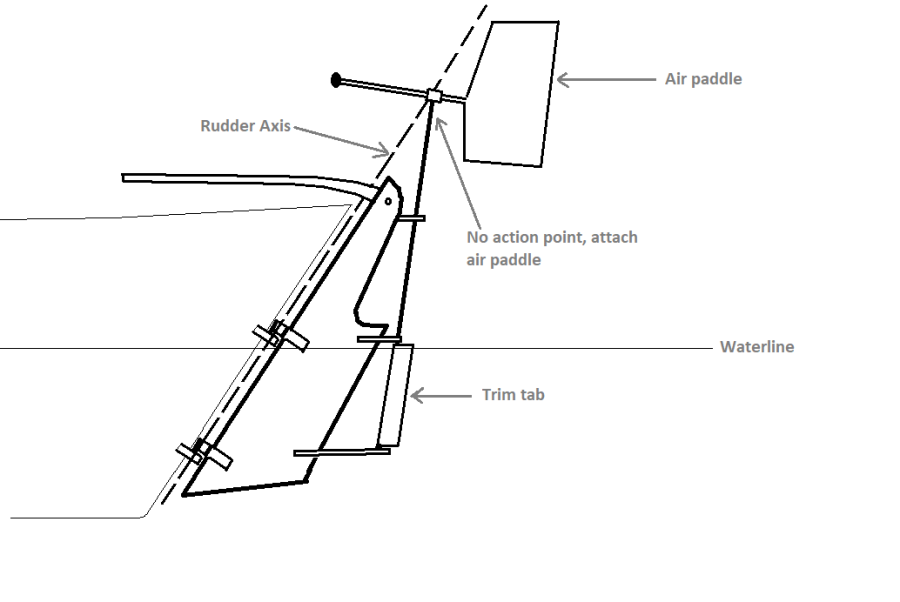
It’s all about leverage. There will be an air paddle which will weathercock to the wind and provide enough torque to move the trim tab which we are going to mount on the trailing edge of the rudder. The trim tab will be a slender, high aspect ratio blade, and we will add some “balance” to it–a little bit of the blade will lead the shaft–all so as to lessen the torque required to move the trim tab when the water is flowing over it and thus increase the amount of leverage the air paddle has over it.
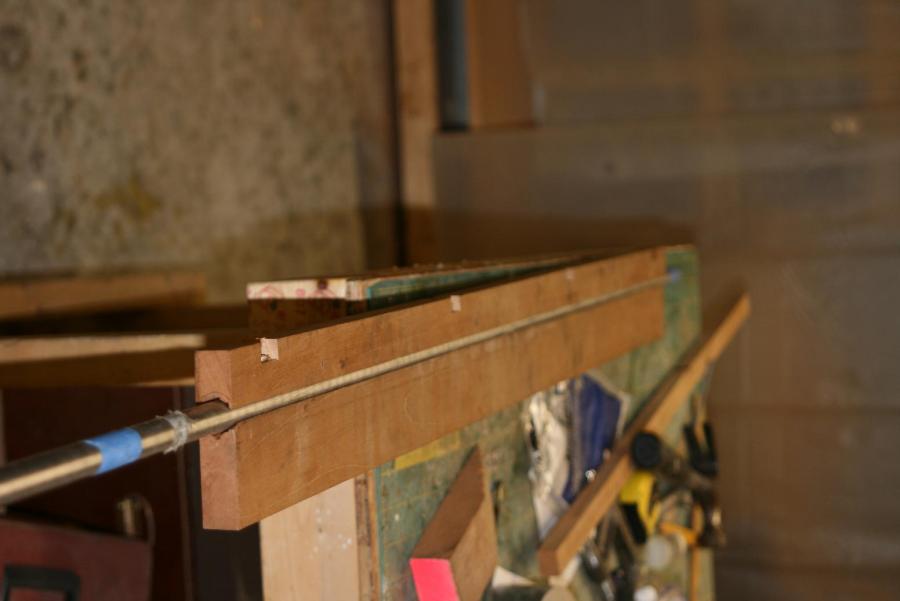
Let’s start with building the trim tab. The trim tab should be somewhere around 10 to 15 percent of the area of the rudder. We decide on the correct diameter of shaft for the blade. In my case this was a 5/8″ diameter stainless steel shaft. We then drill several (say four) holes to take through-bolts which will hold the wooden blade to the shaft. Below is the rough blade held to the shaft with 1/4-20 bolts. Notice the thinner piece on the leading edge, this will give it some balance.
We then permanently attach the blade with the bolts and 3M 5200 and begin fairing:
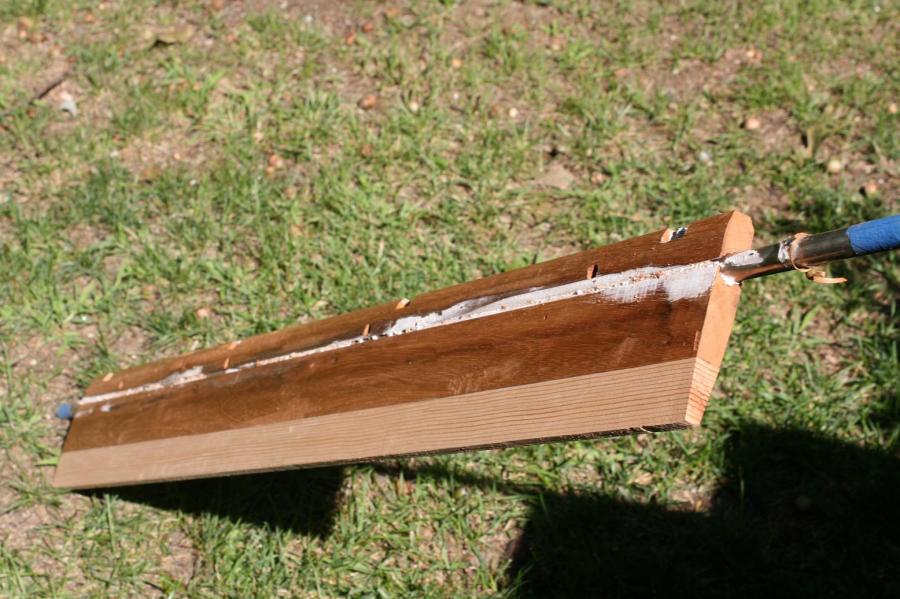
Following fairing and shaping we will then encase the entire blade in fiberglass roving and epoxy, this will add a great deal of strength and durability.
Now we have to mount it on the end of the rudder. But before we start drilling any holes, we need to work out some geometry. The trim tab must be mounted such that the air paddle will attach at the “no action point”; that is, where the trim tab shaft intersects the axis of rotation of the rudder. This is important because if the air paddle is not attached at this point, the turning of the rudder will wag the air paddle back and forth resulting in poor performance. Hopefully the diagram below will make this clear:
For the gudgeons on the rudder I used 1″ thick pieces of ash which I cut like opened jaws to slide onto the trailing edge of the rudder. They were finally attached with through-bolts and plenty of 3M 5200. For the bottom gudgeon I drilled a slightly oversized hole for the shaft to drop down through. On the inside of the hole I put a few laminates of epoxy and fiberglass roving to minimize friction and make it snug (note: I’ve since inserted a nylon bushing, which works better).
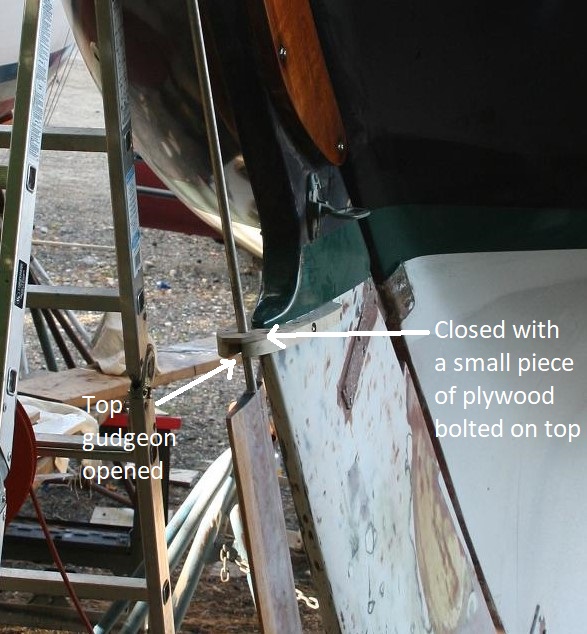
Similarly for the upper gudgeon EXCEPT that I opened the hole to the outboard end so that it formed a “U” and then closed it with a small U-shaped piece of plywood bolted on top and facing inboard (see pics below). Why? So that the trim tab can be removed for servicing.
And finally there is a third gudgeon at the rudder head, which is simply screwed onto a wooden cleat mounted there, again so that it can be easily removed.
Now we have come to the issue of attaching the air paddle. First of all, the air paddle needs to be balanced. This means the axis where the trim tab shaft runs through it is also the center of mass, or if the shaft was held horizontally and the air paddle free to rotate it would not choose to do so absent any wind. Since the plywood air paddle has weight, this will require a counterweight for which I used a regular shaft zinc clamped to a wooden dowel.
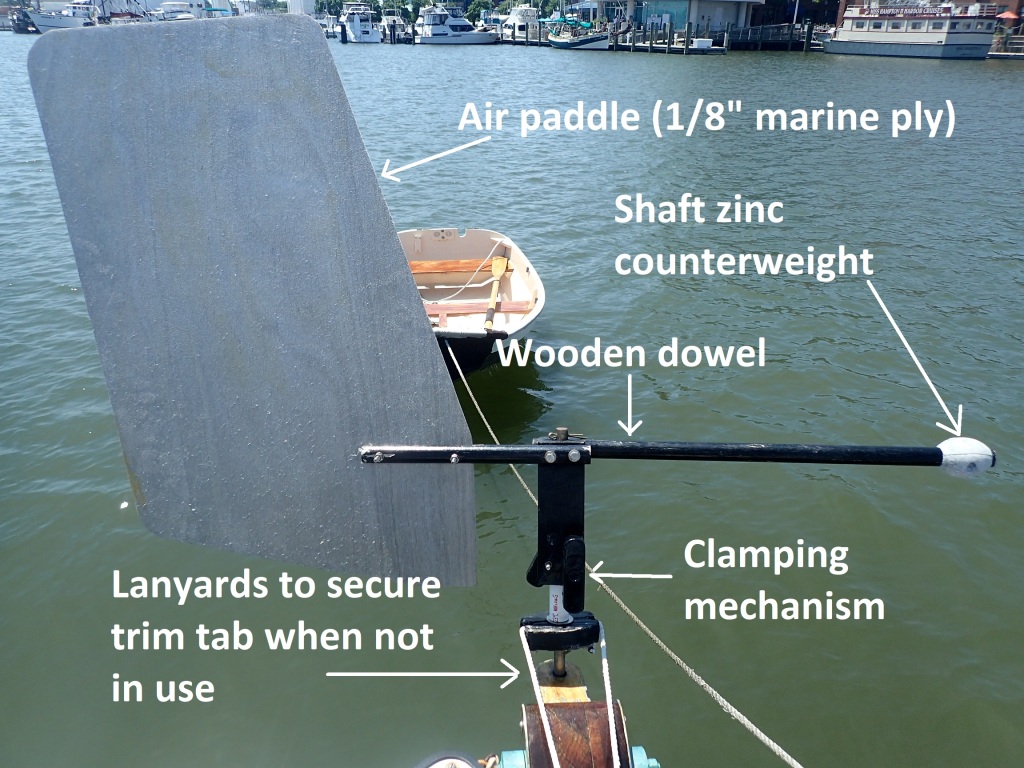
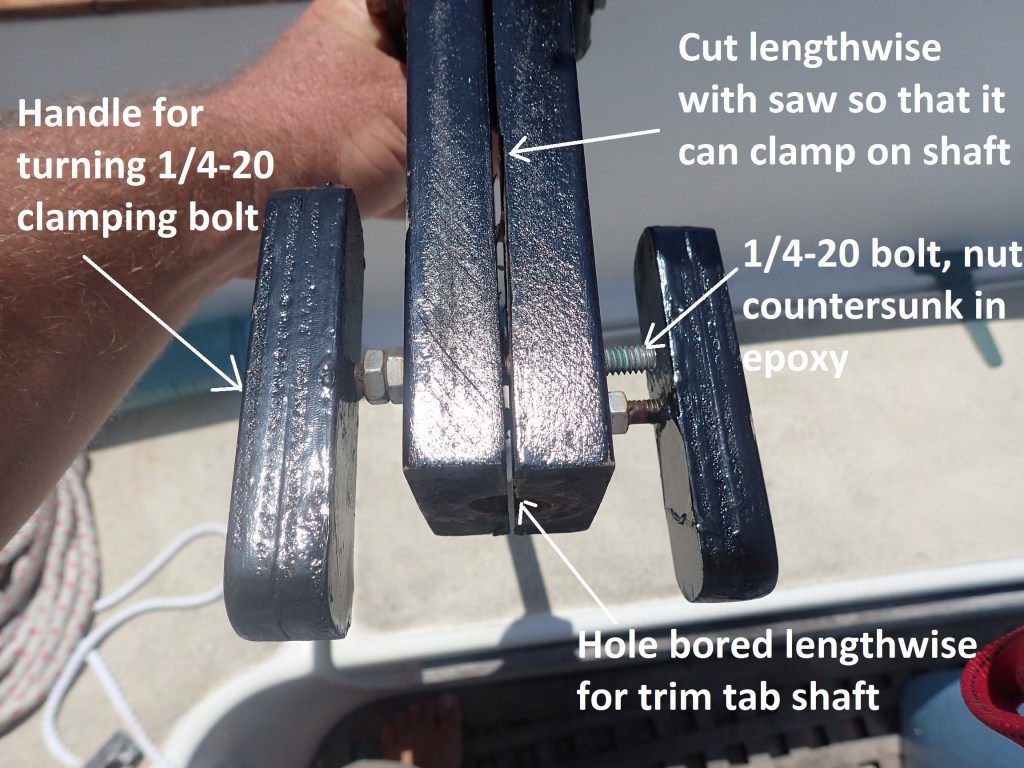
With our air paddle and counterweight constructed the last remaining item is the engaging mechanism. I opted for the simplest possible, simply boring a hole up a rectangular piece of timber for the shaft to pass through, and then sawing about halfway up from the bottom (see above photo). The air paddle and counterweight are bolted at the top, while at the bottom, on either side of the bored shaft hole, are 1/4-20 bolts with big handles on them. The opposing nuts are set in epoxy. Thus the air paddle can freely turn on the shaft until I tighten the bolts, when it clamps onto the shaft and the windvane is thus engaged.
And that’s it. So far this vane has steered me over 30,000 miles. I can get it to work in winds down in the 3-6 knot range, and then it has steered the boat while running before a gale under bare poles. In order to work well in light airs the gudgeons must be greased from time to time. This can easily be accomplished in the water while donning a mask and snorkle. Just lift the trim tab up a few inches (it cannot actually pop out of the bottom gudgeon before the blade runs up against the upper gudgeon–with the little plywood cap on, of course), clean, grease, and set back down.
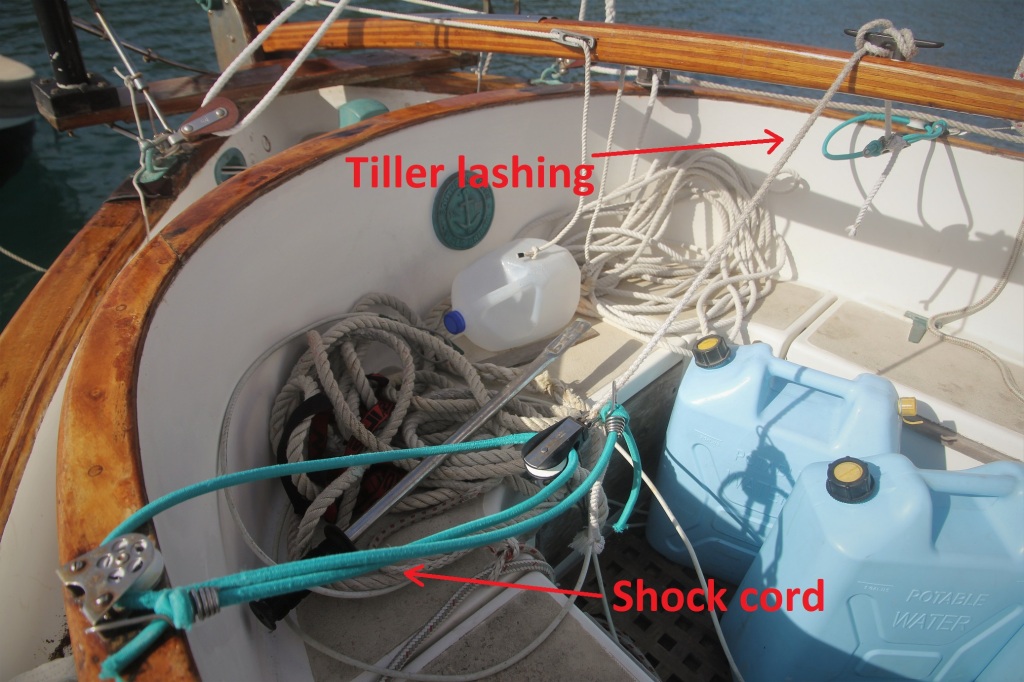
Now one peccadillo I have found with this type of steering vane is the tendency to over-steer. It tends to shove the helm too fast and too far on either side, causing the boat to sail a slalom course. One cure for this is to attach shock cords to your tiller lashings which will greatly dampen the effect. The size and setup of the shock cords will vary from boat to boat. Here is my current setup shown below: